“`html
How to Clarify Wine with Gelatin Without Ruining Flavor
Wine clarification has gotten complicated with all the conflicting advice flying around. I’ve been making wine at home for about eight years now, and honestly, the moment I figured out how to use gelatin properly — without stripping out those delicate fruit notes I’d spent all year developing — changed everything about my results. For the first few years, I either drank cloudy wine or watched helplessly as commercial fining agents flattened the character right out of my batches. Then I realized gelatin wasn’t some mysterious chemistry trick at all. It’s actually the gentlest clarification method available. You just have to know what you’re doing.
Here’s what I see with most home winemakers: they panic about haze. They throw in whatever fining agent seems popular, cross their fingers, and hope for the best. The wine clears, sure. But it tastes flat. The body disappears. The finish feels thin. They blame the grapes or their process, when really they just over-fined. That’s frustration I lived with for way too long.
Let me walk you through exactly how to use gelatin properly — and why it works better than you probably think.
Why Gelatin Works Better Than You Think
Your wine looks cloudy because tiny particles are floating around in there. Dead yeast. Tannin complexes. Proteins. They’re too light to sink on their own. Gelatin molecules are positively charged — they bind to these negatively charged particles, forming larger clumps heavy enough to drop to the bottom. Gravity does the rest.
Here’s what makes this different: gelatin is remarkably selective. It grabs what’s making the wine hazy without aggressively stripping flavor compounds the way some synthetic fining agents do. I’ve compared batches side by side. Same wine, one clarified with gelatin, one with commercial egg white product. The gelatin version always tasted more like itself.
The practical side matters too. Gelatin works fast — 5 to 10 days instead of weeks. And it costs almost nothing. A small box from the grocery store runs maybe $3 and clears 5 to 10 gallons depending on how cloudy things are. Compare that to specialty fining packets running $8 to $12 each.
When should you reach for gelatin? If you’re making red wines, white wines, or fruit wines where preserving delicate aromatics matters, gelatin wins. If you’re working with limited budget and need something reliable, gelatin is your answer. If fermentation went sideways and you’ve got residual particles, gelatin handles it without judgment.
One scenario where gelatin isn’t ideal: extremely high tannin wines where you’re actually trying to reduce astringency. Gelatin can bind to some tannins, which might not be what you want. But for straight clarification? Nothing beats it.
Preparing Your Gelatin Solution Step by Step
This is where most people mess up. Probably should have opened with this section, honestly, because preparation determines whether your gelatin actually works or sits there doing nothing.
You need unflavored gelatin. Plain Knox brand from any grocery store works perfectly. You’ll also need two containers — one for blooming, one for warming. A kitchen scale helps but isn’t required if you’re comfortable measuring by teaspoon.
Here’s the exact process I use for 5 gallons of wine:
- Measure 1 teaspoon of unflavored gelatin (about 2.5 grams if you’re weighing it). Some people use 1.5 teaspoons for really cloudy wine, but I start conservative.
- Pour 1/4 cup of cold, distilled water into a small bowl. Not warm water — cold. This step is called blooming.
- Sprinkle the gelatin evenly over the cold water. Let it sit untouched for 5 minutes. Don’t stir yet. The gelatin absorbs water and becomes a solid mass.
- After 5 minutes, stir gently until smooth. You’re looking for a thick, gel-like consistency with no lumps.
- Heat a separate 1/4 cup of distilled water to about 110°F — warm to the touch but not hot. Pour it slowly into your gelatin mixture while stirring constantly.
- Keep stirring until completely dissolved. The mixture should look like clear liquid gelatin now, not cloudy.
Temperature control here is critical. Boil your gelatin? You kill its ability to bind particles. Get it too hot and the molecular structure breaks down. Too cold and it won’t dissolve properly. I learned this the hard way during my second year — used boiling water and wondered why my gelatin solution literally did nothing. My wine stayed cloudy for three weeks straight.
One more detail: wait 15 minutes after dissolving before adding the solution to your wine. Let it cool to room temperature. This prevents thermal shock to your wine and keeps the gelatin stable when it hits the carboy.
Adding Gelatin Without Stripping Wine Character
Timing your gelatin addition is almost as important as preparing it correctly. Add gelatin right after you rack your wine away from the primary sediment — so post-fermentation, post-yeast settlement. This is typically 3 to 4 weeks after you started the fermentation, depending on your yeast and temperature.
Never add gelatin to wine that’s still actively fermenting. The yeast activity interferes with particle binding and wastes your gelatin. That was a mistake I made. That was 1998.
Pour your gelatin solution into the carboy slowly, then stir very gently with a long spoon or stirring rod. Gentle stirring — I cannot emphasize this enough. You’re not trying to mix it aggressively. You want the gelatin distributed evenly without introducing excessive oxygen. Over-oxidation flattens wine faster than over-fining does.
Make about 40 to 50 clockwise rotations with your spoon, then stop. That’s enough. Your gelatin will distribute on its own over the next few hours.
Here’s what separates people who clarify successfully from those who don’t: patience with dosing. Less gelatin, more time. That’s the mantra. If you add 1.5 teaspoons and it clears in 7 days, great. If you add 2 teaspoons thinking you’ll speed things up, you risk removing flavor compounds that should stay in the wine.
How do you know if you’re over-fining? The wine clarifies, but when you taste it, something’s missing. It tastes thin. Hollow. The tannin structure flattens. Your mouth doesn’t feel anything. That’s your signal you used too much — don’t make my mistake.
Settling Time and What to Expect
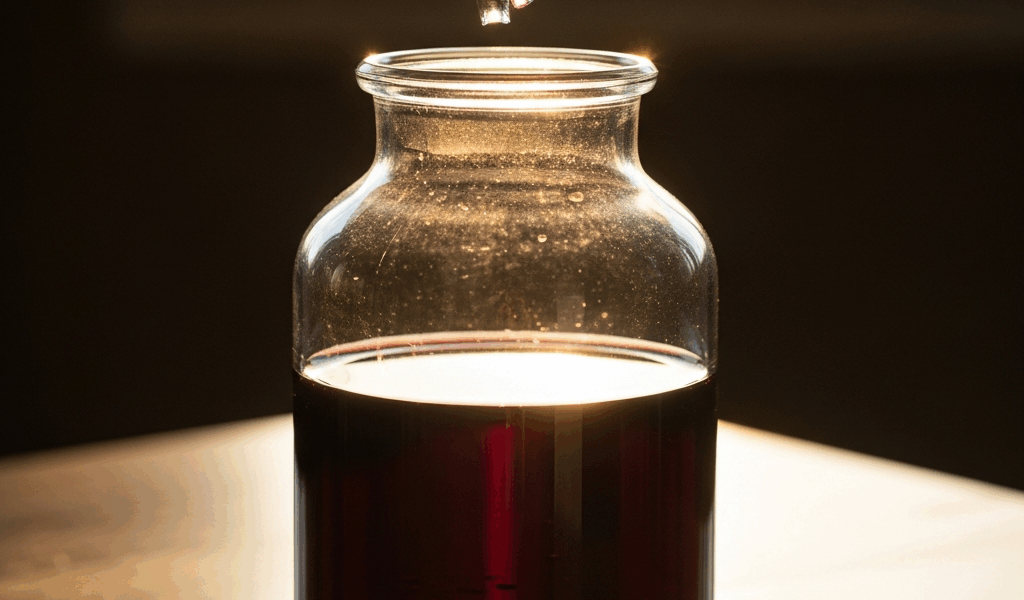
After you add gelatin, your wine won’t clear immediately. Day one looks exactly the same. Day two and three: you might notice a slight haze starting to gather near the bottom. This is normal. The gelatin is working, binding those particles into larger clumps that gravity can handle.
By day 5 to 7, you should see visible sediment accumulating on the bottom of your carboy. The wine above it starts looking noticeably clearer. This is your signal that the process is progressing the way it should.
By day 10, most home wines are clear enough to bottle. But what does “clear enough” actually mean? Commercially, wines are crystal clear. For home wine, you’re aiming for transparency — hold the carboy up to light and you should be able to read text through it without strain. A slight golden or ruby hue is fine depending on your wine type. You’re looking for absence of cloudiness, not perfection.
Around day 7 to 8, rack your wine again, this time leaving behind the gelatin sediment layer. Use a siphon to avoid disturbing the settled material. This second racking removes the gelatin sludge before bottling and keeps your wine clean.
Don’t bottle immediately after the second racking. Let it sit another 2 to 3 days. Any disturbance from siphoning can kick up fine particles. Waiting lets those settle again.
Troubleshooting Clarification Problems
What if it’s been 10 days and your wine still looks hazy? I’ve been there, and it’s frustrating.
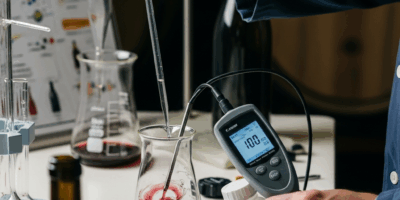
First, check your pH. Gelatin works best in wines with pH between 3.0 and 3.8. If your pH is way off — too acidic or too alkaline — gelatin won’t bind particles effectively. You can test this with pH strips ($8 on Amazon). If your pH is 2.5 or below, that’s your problem. You’d need to adjust it before fining, which is a separate process entirely.
Second, temperature matters more than you’d think. If your wine storage is cold — below 55°F — gelatin moves slower. It still works, but you might need 14 to 16 days instead of 7 to 10. If your wine is above 70°F, gelatin works faster but can also be more aggressive about binding. Aim for 55 to 65°F during clarification.
Third, high tannin wines sometimes look hazy even after gelatin because tannin complexes themselves scatter light. This isn’t failure. Your wine isn’t cloudy with particles — it’s just tannic. Time solves this. Those tannin polymers stabilize naturally over months and years.
Can you add more gelatin if it isn’t working? Yes, but sparingly. Add half your original dose (0.5 teaspoon for 5 gallons) and wait another week. Don’t chase clarity by adding more and more gelatin. At some point, you’re not clarifying anymore — you’re stripping what makes your wine interesting.
Is cloudy wine safe to drink? Absolutely. Haze doesn’t mean anything is wrong with your wine. It’s just particles floating around. Some people don’t bother clarifying at all. It’s purely aesthetic and personal preference — nothing more.
One last thing: if you’ve tried gelatin and it genuinely isn’t working after 15 days, you can switch methods. Try isinglass (fish bladder fining), which works differently and might succeed where gelatin didn’t. Or accept the haze. Both are legitimate choices. I’m apparently someone who overthinks this stuff, and isinglass works for me while some people never need anything at all.
The goal here isn’t perfection. It’s learning to clarify thoughtfully, respecting your wine enough to avoid over-processing it. Start with gelatin. Use measured amounts. Wait patiently. Your wine will thank you for it.
“`


Stay in the loop
Get the latest winemaker's friend updates delivered to your inbox.