Why Your Wine Turned Out Too Dry
Home winemaking has gotten complicated with all the conflicting advice flying around. As someone who’s been fermenting batches in my garage since 2016, I learned everything there is to know about fixing wine that comes out bone dry. Today, I will share it all with you.
Here’s the moment every home winemaker dreads: you rack the wine off the sediment, pour a small glass, take a sip — and your mouth just puckers. The fruit’s still there. The color looks beautiful. But the sweetness is completely gone, like it never existed.
Yeast did that. It doesn’t care what you envisioned for this batch. It eats sugar until there’s nothing left, full stop. That’s its job, and it’s annoyingly good at it.
A few specific things cause this. Maybe you followed a recipe written for dry-style wine — something modeled after a Cabernet Sauvignon rather than a fruit wine meant to taste like the thing it’s named after. Or your yeast strain just kept going long after you expected it to stop. Wild yeast pulled from fruit skins is especially aggressive that way. Sometimes the math was off from the beginning — not enough initial sugar, a hydrometer reading that got misinterpreted, whatever. And sometimes everything went exactly right and you just want it sweeter than you planned. That happens too.
I wasted an entire gallon of strawberry wine in 2018 because I didn’t know this was fixable. Don’t make my mistake. Dry wine is one of the easiest problems in home winemaking to actually solve.
Stabilize Before You Sweeten — This Step Is Not Optional
Probably should have opened with this section, honestly. This is where people blow up their batches — sometimes literally.
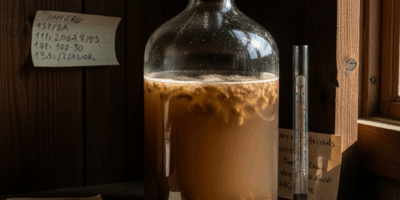
Pour sugar into wine that still has active yeast living in it and you’ve just thrown a party for a population that was almost done leaving. The yeast wakes back up, eats the new sugar, produces CO2, and now you’ve got pressurized bottles sitting in your basement. Best case: inconsistent carbonation. Worst case: you’re cleaning wine off the ceiling at 11pm on a Tuesday. I’ve heard both stories in the forums. Neither ends well.
You need to stabilize first. Two options work reliably for home batches:
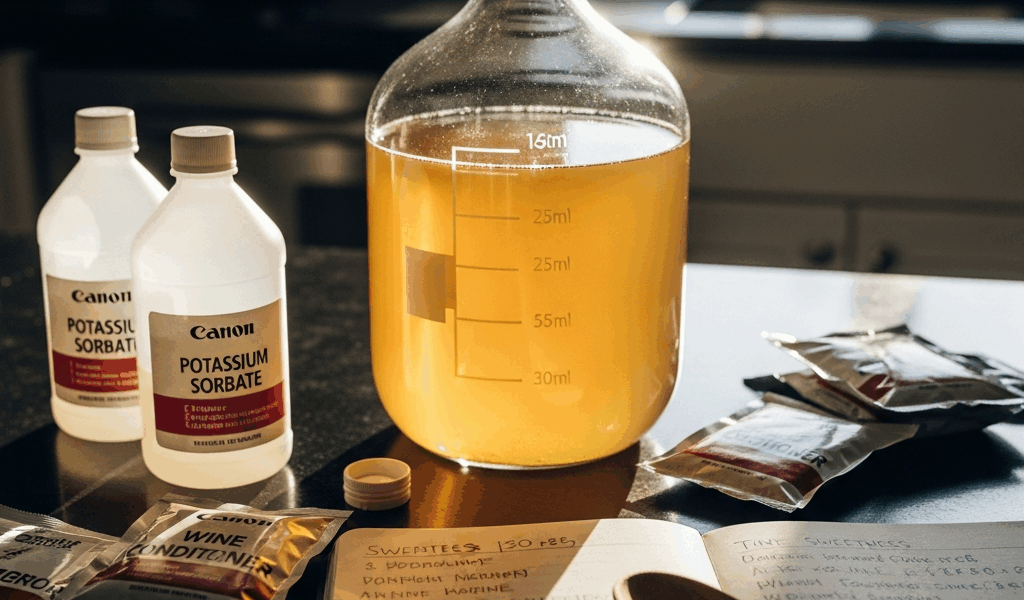
- Potassium sorbate — Half a teaspoon per gallon, dissolved in a small amount of cool water before you stir it in. Sorbate doesn’t actually kill yeast — it stops reproduction, which cuts the population off at the knees. A jar runs about $8–12 and covers dozens of batches. Find it at any homebrew shop or online through MoreWine or Amazon.
- Campden tablets (potassium metabisulfite) — One tablet per gallon, crushed completely, dissolved in a splash of water, stirred in thoroughly. Campden is more aggressive — it kills yeast outright rather than just stopping the reproduction cycle. It releases sulfur dioxide, which smells like struck matches for a few hours. Totally normal. Don’t panic.
I’m apparently a potassium sorbate person — it works for me while Campden never quite fits into my process. No smell, easy to measure, consistent results. After you add whichever stabilizer you choose, wait a full 24 hours before touching the sweetness. Not 12 hours. Twenty-four.
Skipping this step is the mistake I see repeated constantly in Facebook winemaking groups. Someone adds sugar to an unstabilized batch, bottles it, forgets about it for three weeks, and opens a bottle to find it’s gone fizzy and tastes nothing like the sample they pulled before bottling. By then it’s usually undrinkable. Stabilize first. Every time.
How to Back-Sweeten Your Wine Step by Step
So, without further ado, let’s dive in — assuming your wine has been stabilized and you’ve waited your full 24 hours.
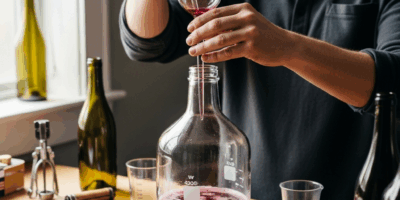
Start with a simple syrup. Two cups of white granulated sugar dissolved into one cup of water — that’s the ratio. Heat it gently in a small saucepan until the sugar disappears completely into the liquid, then pull it off the heat and let it cool all the way down. Hot syrup goes into wine and you’ve introduced temperature shock plus potential off-flavors. Takes maybe five minutes total. Not complicated.
Now add it slowly. One to two ounces of cooled syrup per gallon, poured into a clean glass of your wine, stirred gently for about a minute. Taste it — and actually taste it. Hold it on your tongue for a few seconds. Write down what you added and what the result was. Then, if it needs more, add another ounce and go again.
I dumped half a cup of syrup into a three-gallon carboy at once once. Spent the next three hours trying to figure out how to dial it back. Now I use a small measuring spoon — sometimes a literal eyedropper for the final adjustments. Slow is fast here.
White sugar works perfectly well, but you’ve got options. Honey adds a floral undertone that’s genuinely lovely in fruit wines — peach wine with a small honey addition is something special. Grape concentrate tastes more like wine body than pure sweetness, which is useful when you want to round out a batch without making it taste obviously sugared. Both cost more than $3-per-bag table sugar, but for a batch you’ve invested weeks into, the upgrade is worth it.
After you hit a sweetness level that tastes right, let the wine sit for another 24 hours before you make any final calls. Sweetness perception shifts overnight — what seemed perfect at 8pm sometimes feels slightly off by the next morning. I’ve nearly over-sweetened three separate batches by bottling too fast after adjusting.
How Sweet Should Your Wine Actually Be
But what is the right sweetness target? In essence, it’s whatever matches the style you’re making. But it’s much more than that — it’s about knowing what your fruit wine is supposed to taste like versus what a grape wine should taste like.
Winemakers measure this as residual sugar in grams per liter. Here’s the actual breakdown:
- Dry — 0 to 4 g/L. Minimal sweetness. Tannins and acidity dominate. Most traditional grape wines live here.
- Off-dry — 4 to 12 g/L. Just enough sweetness to soften acidity. Rieslings. Some rosés. A nice middle ground.
- Medium-sweet — 12 to 45 g/L. Obviously sweet. Aperitif wines. Fruit wines meant to taste like their fruit.
- Sweet or dessert — 45+ g/L. Dessert in a glass. Port territory. Late-harvest styles.
Strawberry wine, peach wine, blackberry wine — medium-sweet is what people expect from those. Nobody pours a glass of strawberry wine hoping for tannin structure. They want to taste strawberries. Sweetness is what makes fruit wines endearing to us home winemakers, because it lets the fruit actually speak.
Grape-based batches made from raisins or concentrate sit better in the off-dry range. Know your fruit, know your style. You don’t need a density meter to figure this out — just taste it against something commercial you like and work toward that.
Tasting and Adjusting Before You Bottle
While you won’t need a full laboratory setup, you will need a handful of small jars and some patience before committing to bottles.
Pull one cup of your stabilized wine into a separate container. Sweeten just that cup — same method, same small increments, same careful tasting. Once it tastes exactly right, do the math: how many ounces of syrup per cup translates to how many ounces per gallon. Scale it up and apply it to the full carboy. This approach protects the whole batch from a measurement miscalculation on a tired Tuesday evening.
First, you should check whether the wine tastes flat-sweet after adjusting — at least if you want to understand why something still feels off. That dull, flabby quality even after adding sugar usually points to an acid balance issue rather than a sweetness issue. Low-acid wine tastes like it’s missing a dimension regardless of how much sugar you add. That’s a separate fix and honestly a separate article, but worth flagging before you bottle and wonder why it doesn’t quite land.
Potassium sorbate might be the best option for stabilization, as back-sweetening requires a yeast population that has genuinely stopped working. That is because even a small amount of residual yeast activity turns your sweetened wine into something unpredictable over weeks in the bottle.
Over-dry wine is recoverable. Most batches — even the ones that taste like drinking chalk — can be brought back with stabilizer, some syrup, and a little time. Take the adjustments slowly, taste at every stage, and you’ll end up with something you actually want to open again.


Stay in the loop
Get the latest winemaker's friend updates delivered to your inbox.