“`html
Is It Bitter or Just Dry and Tannic—
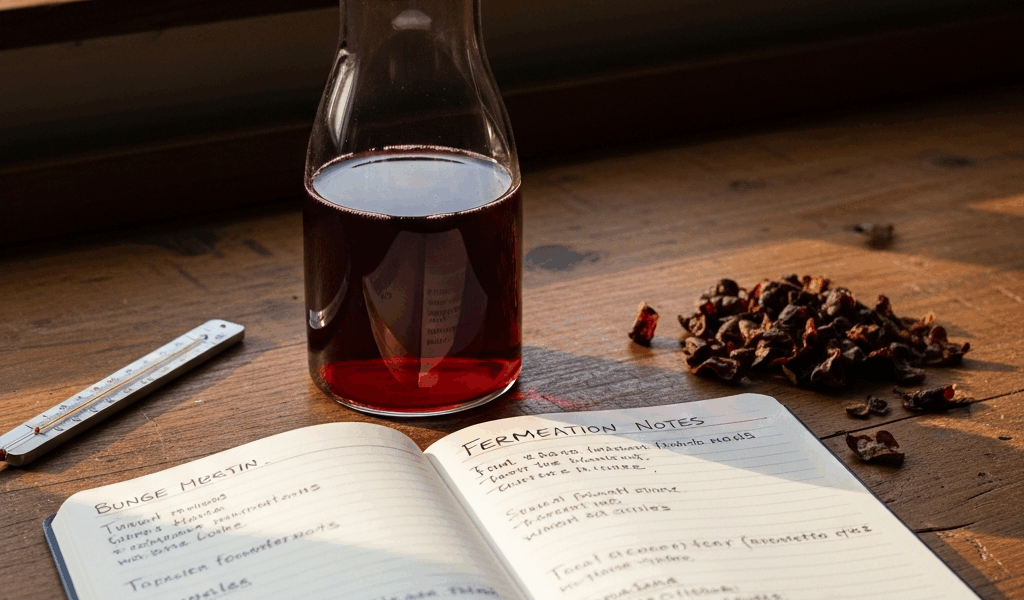
When I first tasted my homemade wine after fermentation, I immediately assumed something went catastrophically wrong. The wine tasted bitter. My first instinct? Dump it and start over. Except I didn’t, and that hesitation taught me something crucial: what I was experiencing wasn’t necessarily bitterness at all.
Here’s what most people get wrong about this. Dry wine and bitter wine feel similar on your palate — but they’re completely different problems. Dry means the yeast ate all the residual sugar. That’s actually the fermentation working correctly. Bitter is a harsh, astringent sensation that lingers and makes you pucker involuntarily.
To test which you actually have, try this: take a small taste and hold it on your tongue for five seconds without swallowing. Dry wine will taste thin and alcohol-forward but clean. Bitter wine will coat your mouth with an unpleasant grip that doesn’t fade quickly. Real bitterness feels aggressive — it’s the taste equivalent of sandpaper.
I use a quick reference method now. I’ll taste my fermented wine against a store-bought dry wine of the same type. A dry Riesling against my Riesling, for example. If mine tastes similar but just thinner, it’s probably fine and just needs aging or blending. If mine tastes actively unpleasant while the commercial wine is pleasant, now we’re troubleshooting actual bitterness.
The misdiagnosis problem matters because wrong diagnosis means wrong fixes. You think you have incomplete fermentation when you actually have over-extracted tannins? You’ll back-sweeten a wine that doesn’t need sweetness. You’ll just make it worse.
Five Root Causes of Bitter Homemade Wine—
1. Over-Extraction from Skins and Seeds
This is the most common culprit I’ve encountered, and it’s usually the winemaker’s fault — mine included. Over-extraction happens when grape skins, seeds, or fruit solids stay in contact with the fermenting liquid too long. The longer contact time, the more tannins and bitter compounds leach into your wine.
The bitter profile from over-extraction is harsh and immediate. You taste it right on your first sip. It doesn’t fade. Red wines are more susceptible because they’re fermented on skins intentionally, but even white wines can suffer if you leave fruit material in the carboy too long.
When I made my first batch of homemade red wine using a basic kit, I left the fruit pulp in for seventeen days. The instructions said ten. I thought longer contact would mean more flavor extraction, more character. What I got was a wine so astringent I could barely drink it. That’s over-extraction in a nutshell.
2. Incomplete Fermentation with Residual Sugar
Sometimes bitterness masks itself. Your yeast gets lazy or dies before consuming all the sugar. The remaining sugar should taste sweet, right? Not always. Tannins can dominate your perception and make the wine taste bitter despite having residual sugar still present.
This usually shows up as a wine that tastes bitter but also feels slightly heavier on the tongue than it should. There’s a glossy texture that shouldn’t be there in a dry wine. You’re often confused because you expected the wine to be dry, but instead it’s both sweet and bitter — an unpleasant combination.
3. Sanitation Failure or Wild Yeast Infection
A contaminated batch creates a specific bitter-funky taste that’s almost medicinal. It’s bitterness plus something else — vinegar notes, nail polish remover notes, or a sharp metallic edge. This is nastier than simple over-extraction.
Wild yeast or bacterial contamination happens when your equipment wasn’t properly sanitized. I learned this the hard way using a brush that was technically clean but hadn’t been properly dried after rinsing. Contamination created a wine that tasted bitter and sour simultaneously, and there’s almost no fixing that short of pasteurization.
4. Poor-Quality Fruit or Concentrate
Not every batch of grapes or fruit concentrate is equal. Oxidized fruit, over-ripe fruit with high tannin content, or discount-brand concentrates sometimes just taste inherently harsh. You’re not extracting wrong — the ingredient itself is the problem.
I once bought a bulk discount wine kit for $28 (should have been my first warning) and the concentrate tasted bitter straight from the can. The finished wine tasted bitter too. Throwing good effort after bad ingredients doesn’t change the outcome.
5. Oxidation During Aging
If bitterness appeared slowly over weeks or months during aging, oxidation might be the cause. Too much air exposure or loose seals on carboys introduce oxygen, which degrades wine and creates stale, bitter notes. The bitterness is subtle but persistent. You’ll notice the wine tastes flat and unpleasant, not fresh.
How to Test Which Cause You Have—
Probably should have opened with this section, honestly. Most winemakers can diagnose their own batch with tools they already own.
Gravity Check: Use a hydrometer to measure your final gravity. Fill a test cylinder with a small wine sample and float the hydrometer. If the reading is 0.995 or lower, fermentation completed. If it’s 1.005 or higher, you have residual sugar. This tells you immediately whether incomplete fermentation is part of your problem.
pH Test: Grab pH strips — pH 2-8 range works fine. Dip a strip in your wine. Wine should read between 2.8 and 4.0. Anything below 2.8 is excessively acidic and contributes to harsh bitterness. This narrows down whether tannins or acid imbalance is your real issue.
Taste-Timeline Review: When did you first notice the bitterness? Immediately after racking from the primary? Then it’s over-extraction. After months of aging in the carboy? Then it’s probably oxidation. This simple timeline often tells you everything.
Ingredient Audit: Review exactly what you used. What brand of concentrate? What fruit source? What yeast strain? If the concentrate was from a budget source or fruit was over-ripe, ingredient quality is your diagnosis.
Sanitation Review: Think back to your process. Did you clean equipment thoroughly? Was everything properly rinsed? Do you have contamination notes — vinegar smell, cloudiness, visible mold? Sanitation failures usually announce themselves pretty loudly.
Fixes for Each Cause—What Actually Works—
Over-Extraction: Rack the wine off the solids immediately if you haven’t already. Fine it with egg white or gelatin to pull tannins out of suspension. You can filter through cheesecloth or coffee filters to physically remove particles. This won’t undo extraction completely, but it helps. For future batches, reduce skin contact time by three to five days.
Incomplete Fermentation: Back-sweeten with concentrated juice or simple syrup (1:1 sugar-to-water ratio, cooled). Add small amounts — quarter cup at a time — and taste between additions. You’re balancing bitter tannins with sweetness. Or blend with a finished, sweeter batch if you have one available. Blending is honest problem-solving.
Sanitation Failure: If you suspect contamination, pasteurize the batch. Heat the wine to 150°F for 30 minutes (use a thermometer, don’t guess). This kills wild yeast and bacteria. The wine won’t be ideal, but it’s salvageable for cooking or blending. Never serve contaminated wine to guests.
Poor Ingredients: This one’s brutal because you can’t fix it directly. But blending the bad batch with a good batch at a 50-50 ratio sometimes masks the worst flavors. Otherwise, accept it as tuition in winemaking education and upgrade your fruit or concentrate source next time.
Oxidation: Unfortunately, you can’t undo oxidation. Going forward, ensure your carboy seal is tight and minimize air exposure during transfers. This batch is a learning opportunity about storage conditions.
How to Prevent Bitter Wine on Your Next Batch—
Contact time control is foundational. For red wines, ferment on skins for eight to twelve days maximum — not longer. Temperature stability matters because cooler fermentation extracts less harshly. Keep your fermentation space between 60–75°F if possible. I use a temperature strip on the outside of my carboy and move it to different areas of my basement to maintain consistency.
Sanitation is non-negotiable. I sanitize with a one-part bleach, nine-part water solution, then rinse with hot water thoroughly. Everything that touches your wine — carboys, airlocks, siphons, test cylinders — must be sanitized. I keep a dedicated brush just for winemaking equipment, stored dry.
Fruit sourcing makes a difference. Buy fruit from reputable suppliers. If you’re using concentrate, check the expiration date and buy from sources with turnover (not dusty shelves). A $35 kit consistently outperforms a $20 kit because the concentrate is fresher.
Monitor fermentation progress with a hydrometer every few days. You’ll catch stuck fermentation early. Use temperature-appropriate yeast strains — wine yeast, not bread yeast. Wine yeast is engineered to handle fermentation conditions and produces fewer off-flavors.
Finally, age properly. Keep your carboy topped off (within an inch of the bung) and sealed. Minimize air exposure. Better to leave wine in the carboy six months too long than expose it to oxygen while you’re uncertain about bottling.
Bitterness in homemade wine isn’t a death sentence. It’s a diagnosis waiting to be made. Test methodically, match the cause to the fix, and your next batch will improve. I’m still not winning any awards for my early batches, but I’m not dumping wine down the drain anymore either.
“`

Stay in the loop
Get the latest winemaker's friend updates delivered to your inbox.