“`html
Why Racking Causes Haze—Even When Fermentation Was Clear
I spent three weeks watching a five-gallon batch of homemade wine, staring at what I could’ve sworn was crystal-clear juice just hours before it turned into a cloudy mess. The frustration was real. Probably should have opened with this section, honestly, because understanding *why* this happens gives you the confidence that you didn’t wreck the whole batch.
Here’s the thing about racking—it’s violent, even when you’re being gentle. You’re moving liquid through a siphon, introducing oxygen, creating turbulence, and suspending particles that had just settled to the bottom. That’s the first culprit: temporary aeration. Your wine absorbs oxygen during the transfer, and oxidation can cloud clarity as compounds recombine.
But that’s often not the real problem.
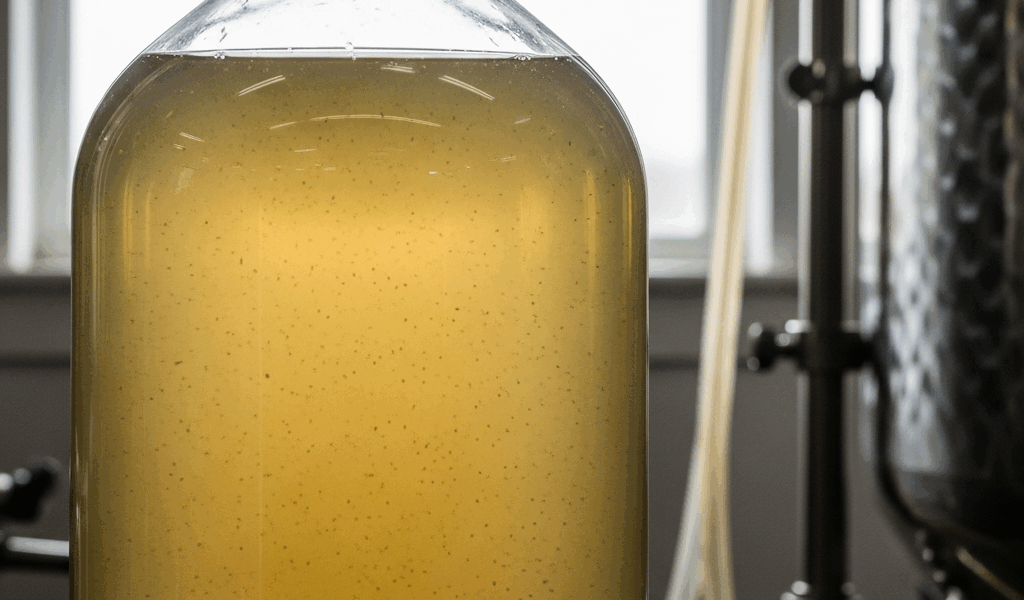
The second issue keeps most winemakers up at night: pectin and protein particles. These are microscopic solids—dead yeast cells, tannins, and proteins from your fruit or added ingredients—that didn’t fully precipitate before you racked. The racking itself agitates them back into suspension. Unlike oxidation haze, which clears in days, pectin and protein particles can linger for weeks because they need either time, cold temperatures, or chemical help to settle again. It’s maddening to watch.
Then there’s the third culprit: wild yeast or bacterial activity. If your wine wasn’t completely stable when you racked, you may have introduced microbes through equipment or your racking process wasn’t clean enough. These organisms multiply post-racking and create cloudiness as byproducts. This one smells bad. Literally—vinegary, cheesy, or just off.
Most of the time, it’s the second problem—pectin and protein. But you need to know which one you’re dealing with before you spend money on fixes that won’t work.
Cold Haze vs Permanent Haze—Tell Them Apart
Here’s the diagnostic test I run every single time, and it takes fifteen minutes flat.
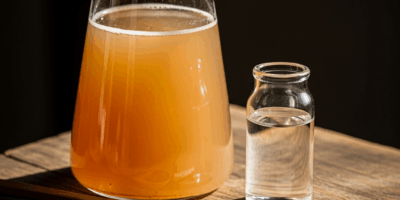
Pour a clear glass of your cloudy wine. Place it in the refrigerator at 38°F (3°C) for two hours. Don’t touch it. Pull it out and look at the clarity.
If the wine is now clear or significantly clearer? You have chill haze—that’s the temporary cloudiness caused by compounds that precipitate when cold but dissolve again at room temperature. Chill haze is harmless and will disappear permanently once you add certain fining agents or let time do the work. You’re not in crisis mode.
If the wine looks exactly the same—still cloudy, still murky—you have permanent haze. These are particles that won’t settle just because of temperature. They need chemical intervention or extended aging. Different beast entirely.
Now swirl the glass gently and watch the haze move. Does it float and drift slowly, or does it move in tight, organized spirals? Haze that drifts indicates very fine particles—protein, pectin. Haze that swirls tightly might indicate yeast activity. These particles are less dense and move differently in the liquid.
Hold the glass up to natural light. Look through it toward a light source. If you can see light transmission but it’s diffused, you have moderate haze. If the light barely penetrates and you can’t see through to the other side at all—you have heavy haze or active microbial growth.
Finally—and this matters more than you’d think—smell it. Seriously. Put your nose near the open glass. Does it smell normal, like your batch should smell? Or does it smell vinegary, cheesy, or off in some other way? Off-smells mean microbial infection. Normal smells mean you’re probably dealing with innocent particle settling.
Five Fixes Ranked by Speed (24 Hours to 4 Weeks)
Once you’ve diagnosed which type of haze you have, pick your fix based on how much patience you have and how much money you want to spend.
Fix #1: Cold Treatment and Waiting (Fastest—24 to 72 hours)
Move your carboy to the coldest spot you have access to. An unheated garage, a basement, or even a refrigerator if your batch is small enough. Hold it at 35–40°F for 48 hours. If your haze is primarily chill haze—confirmed by the fridge test—most of it will precipitate to the bottom and you can rack again, leaving the solids behind. Cost: zero dollars. Patience required: moderate. This doesn’t always work for permanent haze, but it’s worth trying first before you spend anything.
Fix #2: Bentonite Addition (2–3 days)
Bentonite is clay that binds to protein particles and drags them down. For a five-gallon batch, mix one tablespoon of bentonite powder with one cup of warm—not hot—water, let it hydrate for 30 minutes while stirring occasionally, then stir it into your wine. You’ll see cloudiness get worse before it gets better. That’s normal. Let it settle for 48–72 hours, then rack carefully. Bentonite costs about $8 for a container that treats dozens of batches. Find it at any winemaking supply shop, online or local.
Fix #3: Isinglass Fining (4–7 days)
Isinglass is a protein derived from fish bladders. I know that sounds weird, but it works brilliantly on protein and pectin haze. Mix one teaspoon per five gallons with a small amount of cool, acidic liquid—a tablespoon of your wine works fine—let it sit for 15 minutes, then stir into your carboy. Clarity improves dramatically within 48 hours but full settling takes 4–7 days. Cost: about $6 per vial. The catch: it doesn’t work well if your wine is too cold or if you’ve already added bentonite.
Fix #4: Activated Charcoal (Specific case—oxidation haze only)
If you confirmed oxidation haze from your racking process, activated charcoal can help. Use half a teaspoon per gallon, stirred in carefully. It absorbs off-flavors and some oxidation compounds. Let it settle for 24 hours, then rack. This is not a universal fix—it only helps if oxidation is the culprit. Charcoal costs about $10 for a supply that lasts years.
Fix #5: Rack and Wait (Slowest but safest—2–4 weeks)
Do nothing but move the carboy to a cool, dark spot and let time handle it. Particles settle slowly on their own. Yeast cells will eventually either multiply enough to indicate infection—you’ll smell it—or die off and settle. This takes forever, but it costs nothing and you can’t make mistakes. I used this approach on a blackberry wine from 1996 and it cleared beautifully in about 18 days. Your patience is the only input required.
When Haze Means Infection—Red Flags to Catch Now
If your wine smells off, you’re in a different situation entirely.
Vinegary smell means acetic acid bacteria is turning your wine into vinegar. Cheesy or sulfurous smell means wild yeast. Both are infections, not innocent cloudiness.
Here’s what you do: Pour a small taste—don’t swallow if it tastes awful. Does it taste vinegary, moldy, or fizzy on the tongue? If yes, the infection is active. Your options are limited. Either sulfite the batch aggressively—add one campden tablet crushed and dissolved per gallon, wait 24 hours, taste again—which might kill the infection and preserve what you have, or accept the loss.
If the taste is normal and only the smell is slightly odd, you might still salvage it. Use isinglass or bentonite to clear the haze first. Then taste again after settling. Many infections are dormant and won’t flavor the wine heavily if caught early.
If you’re genuinely unsure, do the smell-and-taste test on a wine you know is good, side by side with your questionable batch. Your nose and palate are more reliable than you think.
Prevent Haze on Your Next Batch
You just learned this lesson the hard way. Next time, set yourself up differently.
Add your fining agent—bentonite, isinglass, or pectinase enzyme—one to two days *before* your final racking. Let it settle completely. Then rack into clean carboys, minimizing aeration. Use a racking cane with a sediment trap (costs $12–18) to avoid pulling up settled solids at the bottom.
Rack at the coolest time of day. Temperature fluctuations encourage haze formation because compounds precipitate and redissolve as temperature changes.
Keep your equipment scrupulously clean. One infected siphon or carboy ruins batches. Use a one-step sanitizer like StarSan—about $10 a bottle—and let equipment air-dry.
Most importantly: wait longer before racking. I know fermentation stops bubbling after a week, but give it two weeks minimum before your first racking. Give it four weeks before your final racking. Patience is free, and it prevents ninety percent of haze problems.
Your next batch will be crystal clear. This one taught you what to look for.
“`


Stay in the loop
Get the latest winemaker's friend updates delivered to your inbox.