“`html
Wine Acidity Too High or Too Low — How to Adjust TA and pH
If you’re trying to figure out how to adjust wine acidity, the first thing you need to accept is that “acidity” is actually two separate measurements — and fixing the wrong one is how you ruin a batch. I learned this the hard way during my third year making wine in my garage, when I dumped potassium bicarbonate into a Marquette that tasted sharp, only to watch it go completely flat and still ferment unpredictably through the next summer. Expensive lesson. About $80 worth of grapes and six months of waiting, gone. So let’s do this right.
TA vs pH — Two Different Measurements, Two Different Problems
Probably should have opened with this section, honestly, because almost every mistake home winemakers make with acidity starts here.
TA stands for titratable acidity. It measures the total quantity of acid in your wine — essentially, how much acid your wine contains by volume. The unit is grams per liter (g/L), sometimes expressed as a percentage. TA is what your palate is responding to when you take a sip and your mouth waters or puckers. High TA means tart wine. Low TA means flat, flabby wine with no backbone.
pH measures something different — acid strength, not quantity. It tells you how aggressive those acids are at the molecular level. pH affects microbial stability, how well sulfites perform, browning reactions, and overall wine longevity. A wine with a pH above 3.6 is vulnerable. Bacteria love it. SO2 loses effectiveness fast. You can have a wine with decent TA that still has a dangerously high pH, which is its own problem entirely.
Here’s a quick diagnostic you can run before touching anything:
- Wine tastes too tart or sharp — check TA first. Your total acid load is probably the culprit.
- Wine is browning, smells off, or fermented sluggishly — check pH first. Stability is the issue, not taste.
- Wine tastes flat and dull — TA is likely too low.
- Wine tastes fine but you’re worried about long-term storage — check pH, particularly if you’re making a white.
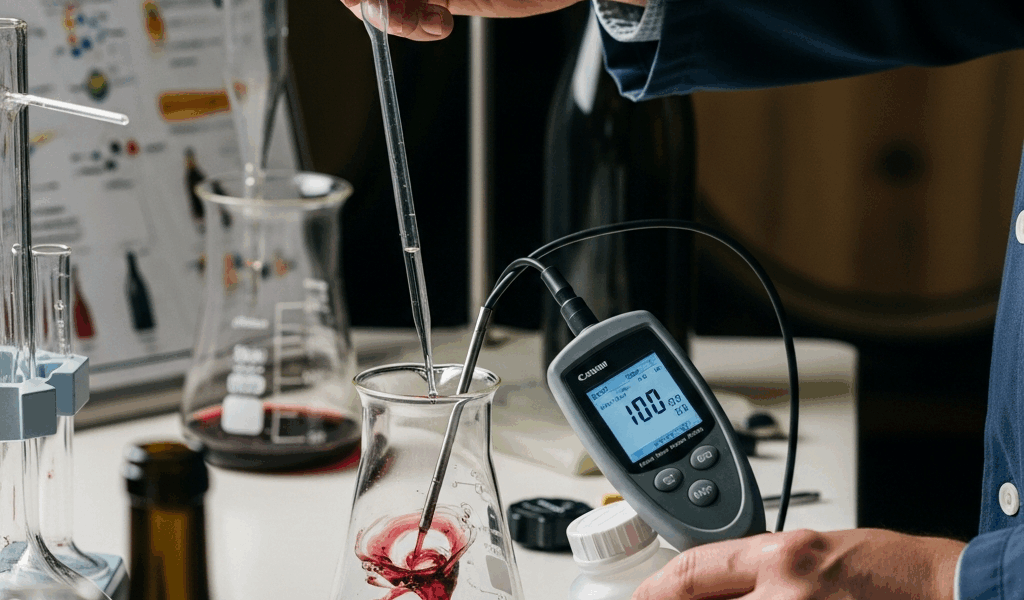
You need both measurements to make an informed decision. A basic titration kit from MoreWine or Midwest Supplies runs about $12-$18 and gives you TA. A decent pH meter — I use the Apera Instruments PH60S, which runs around $55 on Amazon — gives you pH. Get both. Test both. They tell you different things, and you fix them with different tools.
Increasing Acidity — When Your Wine Tastes Flat
Flat wine is demoralizing. You did everything right through harvest, crush, and ferment, and then you taste it and it just sits there. No brightness. No lift. It tastes like grape juice that’s tired.
The fix for low TA is tartaric acid. Not citric, not malic — tartaric. Citric acid is unstable in wine and can be metabolized by lactic acid bacteria into acetic acid (vinegar). Malic acid undergoes malolactic fermentation if any MLB is present. Tartaric is stable, clean, and predictable. Use tartaric acid powder. The brand I reach for is LD Carlson, which is widely available at homebrew shops for around $3-$4 for a two-ounce packet.
Dosage and Method
The standard conversion: 3.8 grams of tartaric acid per gallon raises TA by approximately 1 g/L. This is a reliable number — not perfectly precise across every wine, but close enough for bench trial work.
Here’s the process I follow every single time:
- Calculate how much TA you need to raise and how many gallons you’re working with.
- Dissolve your tartaric acid completely in a small amount of wine — about half a cup — before adding it to the batch. Undissolved crystals added directly can create hot spots that affect your retest readings.
- Add only half your calculated dose to the full batch.
- Stir gently, wait 24 hours, then retest TA and pH.
- Decide whether to add the second half or stop.
The “add half first” rule exists because tartaric acid also lowers pH somewhat, and you can overshoot more easily than you expect. I’ve seen winemakers go from 5.2 g/L to 8.1 g/L in one addition because they did the math perfectly on paper but didn’t account for their wine’s buffering capacity. Wine is not pure water. It pushes back.
Also worth noting: acidity perception changes with temperature and with the presence of residual sugar or tannins. A wine that seems flat at 58°F in your cellar might taste completely balanced at serving temperature. Always taste your bench trial samples at roughly the temperature you’d serve the wine.
Decreasing Acidity — When Your Wine Is Too Tart
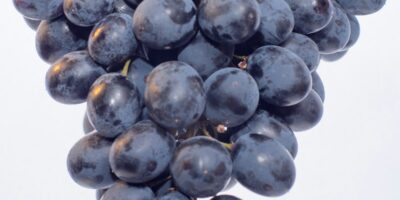
High acidity is more common than low acidity in cool-climate growing regions or with grapes like Marquette, Frontenac, or Niagara. You taste it immediately — a sharpness that doesn’t go away, that edge that makes you want to add water.
There are four tools for this, and they’re not interchangeable.
Option 1 — Cold Stabilization (Recommended Starting Point)
Cold stabilization is free and passive. It works specifically on tartaric acid by encouraging it to precipitate out as potassium bitartrate crystals (cream of tartar). Move your wine to a temperature between 28-32°F for two to four weeks. The crystals form and settle. Rack off them carefully.
This is my first move on any wine with high TA. It’s gentle, it doesn’t strip flavor, and it improves wine stability at the same time. The downside is time and needing a cold enough space — a chest freezer on a Johnson Controller works well for this.
Option 2 — Potassium Bicarbonate (Fast, Chemical)
Potassium bicarbonate (KHCO₃) is the most common chemical deacidifier. It reacts preferentially with tartaric acid and precipitates it out. The general dosage is about 3.4 grams per gallon to reduce TA by 1 g/L, but run bench trials first (see the next section).
The risk here is over-deacidification and flavor stripping. Used correctly, it works well. Used aggressively, it makes wine taste hollow. Add it, stir thoroughly, cold stabilize to encourage precipitation, then rack.
Option 3 — Malolactic Fermentation (Biological, Best for Reds)
MLF converts sharp malic acid into softer lactic acid, reducing perceived acidity and adding complexity. It’s standard practice for most red wines and many whites. The TA reduction you get from MLF depends on how much malic acid is present, which varies by grape variety and vintage. A malic acid test kit tells you this — Accuvin makes a decent one for about $12.
MLF won’t help you if your high TA is tartaric-dominant. Know your acid profile before deciding.
Option 4 — Blending
Blending with a low-acid wine is underutilized at the home scale. If you have a high-acid Frontenac and a flat Concord, blending isn’t a compromise — it might be the best wine you make all year. Run bench trials, document your ratios, and scale up the blend that works.
The Bench Trial — Test Before You Commit
Frustrated by a ruined six-gallon batch years ago, I now refuse to adjust any wine without running a bench trial first. It takes 45 minutes and it has saved me from disaster more than once.
Here’s the exact process:
- Pull four samples of exactly 100ml each from your batch. Use a measuring cylinder — eyeballing doesn’t work here.
- Prepare stock solutions of your adjusting agent at a known concentration. For tartaric acid, I dissolve 3.8g in 100ml of distilled water, giving me a 1 g/L equivalent per ml when added to 100ml of wine.
- Add different doses to each sample. For example: 0.5 ml, 1 ml, 1.5 ml, and 2 ml of your stock solution.
- Stir each sample, cover with plastic wrap, and wait at least 30 minutes.
- Taste each sample blind if possible. Note which tastes best.
- Scale the winning dose up to your full batch volume. A 100ml sample is 1/18.93 of a gallon, so multiply your bench trial dose by the number of hundredths of gallons in your batch.
Never adjust the whole batch at once. This is the single most important rule in home winemaking chemistry. You can always add more. You cannot un-add anything.
When tasting bench trial samples, look for: overall balance, how the acid integrates with fruit, any off-flavors introduced by the additive, and finish length. Harsh, chemical finishes on the potassium bicarbonate samples tell you to use less or try cold stabilization instead.
Target Ranges by Wine Style
These are the numbers I keep taped inside my fermentation cabinet door. They’re not absolute rules — winemaking isn’t that rigid — but they’re solid starting targets.
| Wine Style | Target TA (g/L) | Target pH |
|---|---|---|
| Dry White | 6.0 – 8.0 | 3.2 – 3.4 |
| Dry Red | 5.5 – 6.5 | 3.4 – 3.6 |
| Sweet White / Dessert | 7.0 – 9.0 | 3.1 – 3.4 |
| Rosé | 6.0 – 7.5 | 3.2 – 3.5 |
Sweet wines need higher TA because residual sugar suppresses perceived acidity. A dessert wine at 7 g/L TA tastes balanced because the sugar softens the edge. That same wine dry would taste sharp and aggressive. Context matters.
Dry reds tolerate and often benefit from slightly higher pH (up to 3.6) because tannins carry some of the structural work that acid does in whites. But don’t push past 3.65 on a red without increasing your SO2 additions — free SO2 effectiveness drops sharply above that pH threshold, and you’re leaving your wine unprotected.
A Note on When to Test
Test TA and pH at crush, after primary fermentation, after MLF if applicable, and before bottling. That’s four data points across the life of a batch. Each one tells you something different. Catching a pH problem at crush is easy to fix. Catching it the week before bottling is a scramble.
The Apera PH60S I mentioned earlier needs calibration before each use — pH 4.0 and 7.0 buffer solutions, which come with the meter. Don’t skip calibration. A miscalibrated meter is worse than no meter because you’ll act on bad data with confidence.
Get the measurements. Run the bench trial. Add half what you think you need. Wait 24 hours. Taste and retest. That process isn’t complicated — it’s just disciplined. And in a garage winery where you’re working with five or ten gallons at a time, discipline is what separates wine you’re proud of from wine you quietly dump down the drain in March.
“`


Stay in the loop
Get the latest winemaker's friend updates delivered to your inbox.