Secondary Fermentation Explained — When to Rack and How Long to Wait
Secondary fermentation wine is the phase that separates a drinkable homemade wine from a genuinely good one. I learned this the hard way during my third batch — a Merlot kit from Midwest Supplies that I rushed through secondary in about ten days because I was impatient and wanted to bottle before Thanksgiving. The wine was cloudy, sharp, and tasted like it needed another six months in the carboy. Which, it turns out, it did. That mistake cost me roughly $40 in supplies and a holiday dinner where I quietly apologized to every guest who asked for a second glass. Since then, I’ve slowed down. And the wines have gotten dramatically better.
This guide walks through everything you need to actually make good decisions during secondary — not just what to do, but why it matters and how to read what your wine is telling you.
What Secondary Fermentation Actually Does
Secondary fermentation is quieter than primary. A lot quieter. Where primary is vigorous, foamy, and almost violent in its activity, secondary is slow, steady, and protective. And that shift in character is the whole point.
During primary, your yeast is consuming the bulk of the available sugar and producing alcohol at a rapid pace. There’s a lot of CO2 being released, which actually protects the wine from oxygen during this phase — the gas creates a natural blanket over the surface. When you rack into secondary, fermentation continues at a much slower pace. The yeast is finishing its work, consuming the last small fractions of residual sugar, and the wine begins to settle and clarify.
Three things happen in secondary that can’t be rushed.
First, clarification. The gross lees — chunks of grape solids, dead yeast cells, tartrate crystals — begin to drop out of suspension. Leaving wine on these too long creates off-flavors. Moving it too early means it never fully clears. There’s a window, and learning to read it is a real skill.
Second, off-gassing. Dissolved CO2 from fermentation needs to escape. Wine with too much dissolved CO2 tastes harsh and prickly in a way that’s distinct from intentional carbonation. This is especially noticeable in reds. It takes weeks for CO2 to fully escape through the airlock at room temperature, and some winemakers (myself included) will occasionally stir the wine gently or use a degassing wand — I use a Fizz-X attached to a drill at the lowest setting — to help this along before bottling.
Third, flavor development. Secondary is where integration happens. Fruit notes round out. Tannins soften. The wine starts to smell like wine instead of like fermentation. This doesn’t happen in a week. It takes time and a stable, cool environment — ideally somewhere between 60°F and 70°F.
Skipping or shortcutting secondary doesn’t save time. It borrows time from the final product.
When to Rack From Primary to Secondary
The biggest mistake beginners make here is relying on bubble activity to decide when to rack. Bubbles are unreliable. Airlocks can slow down because of a temperature drop, a better seal, or just natural variation in fermentation pace. The bubbles might look slow without fermentation actually being at the right stage for transfer.
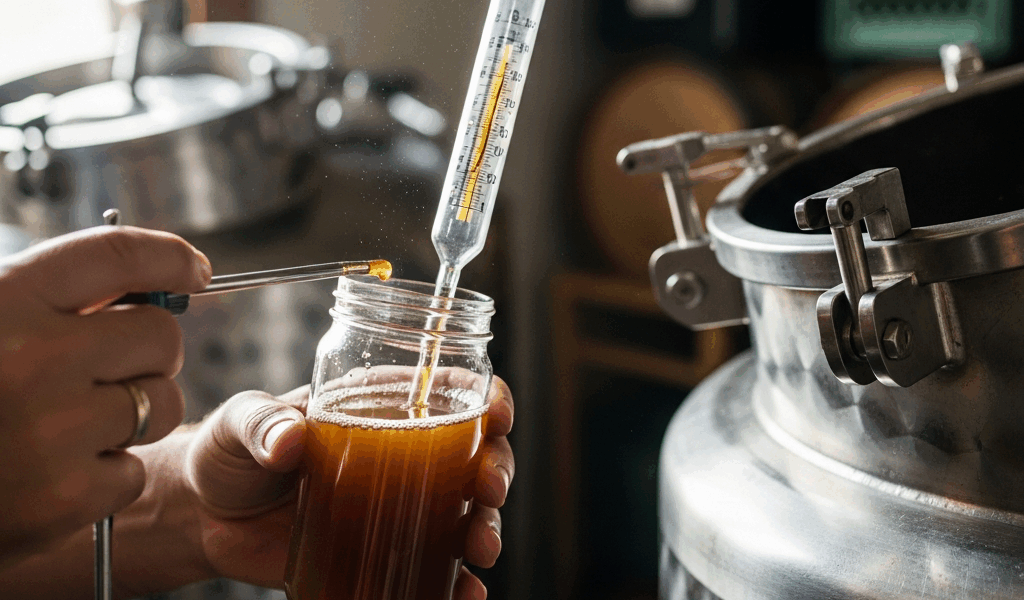
Use a hydrometer. Every time. That’s the answer.
For reds, you want to rack when your specific gravity (SG) reaches somewhere between 1.010 and 1.020. Not 1.000 — that’s too late. You want some fermentation activity still happening when you move the wine, because the continued CO2 production in the secondary vessel helps protect against oxidation while the wine settles. I use a basic glass hydrometer from MoreWine!, which cost me about $8 and has survived four years of use.
For whites, the window is similar but the timing is a bit longer. Whites often take 10 to 14 days to reach that target range, compared to 5 to 7 days for most reds. This isn’t a hard rule — it depends on your yeast strain, temperature, and the sugar content of your must. But as a starting point, it holds up well across most kits and fresh grape batches.
Here’s a practical checklist for racking readiness:
- Hydrometer reads between 1.010 and 1.020
- Vigorous bubbling has clearly slowed — not stopped, just slowed
- A visible layer of lees has formed at the bottom of your primary fermenter
- The wine has begun to show some clarity near the surface
If you’re hitting all four, rack. If your SG is still at 1.030 or above, wait another 24 to 48 hours and check again.
How Long Secondary Takes
Probably should have opened with this section, honestly, because it’s the question I get asked the most: how long do I actually leave it in there?
The minimum is 2 to 4 weeks. That’s the floor, not the target. Two weeks will get you a wine that’s technically done fermenting but hasn’t had enough time to develop or clarify properly. Four weeks is better. Two to three months is where most wines really find themselves.
Here’s how you know secondary fermentation is complete — not probably complete, actually complete:
- Your specific gravity reads 0.998 or below on three consecutive measurements taken 24 hours apart
- The airlock shows no bubbles for 60 seconds or more when you watch it
- The wine is visually clearer than it was two weeks ago
Three consecutive stable readings. That’s the standard. One reading at 0.998 doesn’t tell you much — it could be a lull in activity. Three in a row at that level means fermentation is genuinely finished.
Temperature affects all of this significantly. My basement runs about 62°F in winter, and secondary fermentation takes longer down there — sometimes a full three months for a Cabernet Sauvignon. In my kitchen at 68°F, the same wine would likely finish in six to eight weeks. Neither temperature is wrong. Cooler secondary fermentation often produces a slightly more refined result, though honestly the difference at the home scale is subtle.
Don’t hurry this phase. The wine is doing real work. Your job is mostly to stay out of the way and check readings every week or two.
Common Secondary Fermentation Problems
Three problems come up again and again. Each one has a specific fix.
Stuck Fermentation
Stuck fermentation means your SG stopped dropping before it should have — for example, it’s been sitting at 1.010 for two weeks with no change. Common causes include temperatures below 60°F, nitrogen deficiency in the must, or yeast that got stressed during primary.
The fix: move the carboy somewhere warmer. 65°F to 70°F is ideal for restarting. If warming it doesn’t help after 48 hours, make a starter with a fresh packet of EC-1118 champagne yeast — it’s a workhorse strain that restarts stuck fermentations reliably — and pitch it directly into the carboy. EC-1118 is sold by most homebrew shops for around $1.50 to $2.00 per packet.
Hydrogen Sulfide — The Rotten Egg Problem
If your carboy smells like rotten eggs or struck match, you have hydrogen sulfide. This is a sign of stressed yeast, often from nutrient deficiency or excessive heat during fermentation.
Caught early, it’s fixable. Rack the wine off the lees immediately and add a measured dose of Fermaid-K or DAP (diammonium phosphate) — follow the manufacturer’s dosing instructions based on your volume. Splashing during the rack can also help drive off some of the gas. If the smell persists after two racks and nutrient additions, copper fining is the next step — a copper mesh or copper pipe briefly stirred through the wine reacts with and removes hydrogen sulfide. I’ve used a small copper plumbing fitting from the hardware store in a pinch, and it worked.
Oxidation from Headspace
Oxidation happens when there’s too much air space at the top of your secondary vessel. The wine turns brownish, loses fruit character, and develops a flat, nutty smell. Prevention is straightforward: always top up your carboy so there’s no more than an inch or two of headspace below the neck. Use a compatible wine (same variety if possible), or water with a small addition of potassium metabisulfite.
Once oxidation has occurred, it’s difficult to reverse. Some winemakers use sulfite additions and ascorbic acid to partially mitigate it, but prevention is genuinely the only reliable answer here.
Racking Schedule — How Many Times and When
Frustrated by conflicting advice online, I eventually settled on a three-rack schedule that has worked well across about a dozen batches. Here’s how it breaks down.
First Rack — Primary to Secondary
This is the transfer described above. Happens at day 5 to 14 depending on your wine type and how quickly fermentation progresses. Move the wine when SG hits 1.010 to 1.020. Use a sanitized siphon and try to minimize splashing — some oxygen here is acceptable because the wine is still fermenting and producing CO2, but there’s no reason to aerate aggressively.
Second Rack — Off the Fine Lees
Four to six weeks after your first rack, you’ll notice a thin layer of fine lees — much more compact and chalky-looking than the gross lees from primary — settled at the bottom of your carboy. Rack off this layer into a clean, sanitized carboy. Add potassium metabisulfite at this point if you haven’t already — 1/4 teaspoon per 6-gallon batch is a standard protective dose.
This rack is important. Fine lees left too long can impart off-flavors, and they also create a slightly anaerobic environment at the very bottom of the vessel that can encourage hydrogen sulfide production.
Third Rack — Pre-Bottling Clarification
Optional, but recommended for wines that haven’t fully clarified. This happens roughly 8 to 12 weeks after your second rack, shortly before you plan to bottle. It’s a chance to move the wine away from any remaining sediment and to assess clarity one final time. If the wine is still hazy at this point, this is when you’d add fining agents like Bentonite or Sparkolloid before bottling.
One caution: don’t over-rack. Each racking exposes the wine to some oxygen and some risk. Three racks across a full secondary period is appropriate. If you’re racking every two weeks because you’re anxious or bored, you’re adding risk without benefit. Rack with purpose, not out of nervousness.
Secondary fermentation rewards patience more than almost any other part of the winemaking process. Check your readings, keep the carboy topped up, maintain a stable temperature, and then genuinely leave the wine alone to do its work. The difference between wine you bottled in a hurry and wine you gave three months to develop is unmistakable in the glass.


Stay in the loop
Get the latest winemaker's friend updates delivered to your inbox.