
Is It Actually Stuck or Just Done Fermenting
Home winemaking has gotten complicated with all the conflicting advice flying around. As someone who’s been making wine in my basement for going on eleven years, I learned everything there is to know about stuck fermentation — most of it the embarrassing way. Today, I will share it all with you.
Here’s what nobody leads with: most batches that seem stuck aren’t stuck. They’re finished. I figured this out after racking a perfectly good apple wine three times trying to kick it back into action. The wine was fine. I was the problem.
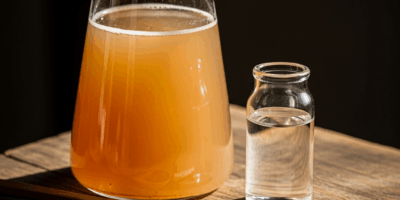
Your hydrometer is the only thing that tells the truth here. Pull a gravity reading from your carboy right now. Specific gravity at 1.000 or below? Fermentation is done. The yeast converted the sugar, made the alcohol, produced the CO₂, and clocked out. That’s a success. Go ahead and celebrate.
Above 1.010? That’s stuck. But what is a stuck fermentation, exactly? In essence, it’s a batch where yeast activity has stopped before all available sugar has been converted. But it’s much more than that — it’s a symptom, not a cause, and treating it without knowing why it happened is how people ruin otherwise salvageable wine.
Before anything else, I need to talk about the airlock trap. An airlock going quiet doesn’t mean fermentation stopped. I’ve watched people lose sleep for two weeks over a silent airlock, only to measure the gravity and find active fermentation still chugging along. Yeast slows down near the end. It produces less CO₂. The bubbles stop. That’s normal. The absence of bubbles means nothing — the hydrometer means everything.
So here’s the actual diagnostic: take a reading today. Write the number down on a piece of tape and stick it to the carboy. Take another reading exactly three days later. Same number both times and you’re below 1.000? You’re done. Same number both times and you’re above 1.010? Then yes — you’ve actually got a stuck fermentation worth fixing.
The Most Common Reasons Fermentation Stops Early
Fermentation doesn’t quit for no reason. Something killed it or starved it. That’s what makes diagnosing this correctly so important to us home winemakers — throw the wrong solution at the wrong problem and you’ve wasted time, money, and a batch you probably cared about.
So, without further ado, let’s dive in.
Temperature Is the First Suspect
Wine yeast has a comfort zone. Most strains want 60 to 75 degrees Fahrenheit. Drop below that range and the yeast essentially goes dormant mid-job. Push above 78 degrees or so and you start killing cells outright. I had a five-gallon batch of apple wine sitting in my unheated garage in February. It stalled completely. Thermometer read 48°F. Moved it inside, parked it next to the water heater, and it woke right back up within 18 hours. The yeast wasn’t dead — just very, very uncooperative.
Your Must Is Starving
Yeast needs nitrogen, vitamins, and minerals — not just sugar. Grape juice has most of those built in naturally. Apple wine doesn’t. Berry wines don’t. Mead especially doesn’t. Start a fruit wine without yeast nutrient and the population peaks early, runs out of fuel, and fermentation fizzles while there’s still plenty of sugar sitting there unconverted.
The Yeast Got Poisoned or Never Woke Up
High sulfite levels kill yeast. Pitch your yeast into a must that’s significantly colder than the yeast culture and you shock the cells into dormancy before they even get started. Sometimes what looks like a stuck fermentation is actually a failed pitch — the yeast never really got going in the first place.
The Sugar Level Is Too Extreme
Start with a gravity above 1.120 and the dissolved sugar creates osmotic pressure that literally dehydrates yeast cells. They can’t function in that environment. The batch ferments partway, the yeast gives up, and you’re left with unintentionally sweet wine. That’s what makes high-gravity musts so tricky — the problem is baked in from the very beginning.
How to Restart a Stuck Fermentation Step by Step
Probably should have opened with this section, honestly. But I wanted you to know what you’re actually fixing before you start fixing it. Here’s the process I’ve used successfully more times than I’d like to admit:
- Fix the temperature first — before anything else. Get the must to 68 to 72 degrees Fahrenheit. A Fermtech heating belt runs about $30 and wraps right around a standard carboy. Or move it to a warmer room. Or wrap it in blankets and set a seedling heat mat underneath. Wait 24 hours, then pull another gravity reading. Sometimes temperature was the entire problem and you’re done troubleshooting right there.
- Make a yeast starter. In a small jar or measuring cup, combine one-quarter teaspoon of active dry yeast — I use Lalvin EC-1118, which is basically the workhorse of stuck fermentation restarts — with one cup of lukewarm water around 100°F and one-quarter teaspoon of plain white sugar. Give it a gentle stir. Let it sit 15 to 20 minutes. It’ll foam up and smell yeasty. That foam means it’s alive and ready. Don’t skip this step. Pitching dry yeast straight into a cold or high-alcohol must is probably the single most common reason restart attempts fail.
- Add yeast nutrient directly to the must. Follow the package directions — usually one teaspoon per gallon — and stir it in thoroughly. Fermaid-O runs about $8 for a small bag and treats several batches. This addresses the starvation problem so the same thing doesn’t kill your second attempt.
- Equalize the temperatures before you pitch. Your starter is warm. Your must might be considerably cooler. Thermal shock will kill the yeast you just woke up. Slowly ladle small amounts of must into the starter container over 20 to 30 minutes. This brings the starter temperature down gradually to match the carboy. Then pour the whole starter in and give it a gentle stir.
- Wait 24 to 48 hours. You should see visible foam, bubbling, or activity at the surface within that window. Nothing after 48 hours means you’re dealing with something more stubborn — see the next section.
EC-1118 works here because it’s highly alcohol-tolerant and genuinely hardy. A packet costs $5 to $7 at any homebrew shop and handles batches up to five gallons easily. I’m apparently a Lalvin loyalist and EC-1118 works for me while Red Star Premier Blanc never quite does. Could be technique. Could be superstition. Either way, don’t make my mistake of grabbing whatever’s on sale.
What to Do If It Still Won’t Restart
Sometimes the batch fights back. This new attempt stalls out just like the original fermentation did — and that usually points to one of three things: the alcohol level is already high enough that yeast simply can’t survive in it, the must chemistry is hostile, or residual sulfites are still actively killing microbes including your fresh yeast pitch.
Test the pH first. Yeast works best between 3.2 and 3.6. Below 3.2 and the must is too acidic. Above 3.6 and it’s too alkaline. Both conditions suppress yeast activity hard. Citric acid or tartaric acid drops the pH down; potassium bicarbonate raises it. A basic pH test kit from any homebrew supplier runs about $12 to $15 — worth having on the shelf regardless.
Try degassing next. Stir the must vigorously for several minutes, or run a drill with a paint mixer attachment on low speed for 30 seconds or so. Fermentation produces CO₂, and dissolved gas can create conditions that make restarting genuinely difficult. Driving it off sometimes gives the yeast room to breathe — literally.
Here’s the honest moment: some batches are just too far gone. Waited 48 hours after the restart. Checked temperature. Checked pH. Added nutrients. Still nothing. Gravity sitting between 1.005 and 1.020 with zero change over three days. At that point, you can try one more strain — Nottingham ale yeast handles tough conditions differently than EC-1118 — but the economics of salvage start getting questionable fast.
The signs it’s time to walk away: the must smells vinegary, or like nail polish remover, or like acetone. Mold visible on the surface. Three weeks of troubleshooting with no progress. Cut the losses. Clean the equipment. Start the next batch.
How to Prevent Stuck Fermentation Next Time
Three habits. That’s really all it takes to avoid most of this.
First, you should measure gravity before you ever pitch yeast — at least if you want any control over how the fermentation goes. Above 1.110? Dilute the must with water until you’re down in the 1.080 to 1.100 range. High starting sugar is one of the easiest problems to prevent and genuinely one of the hardest to fix after the fact.
A temperature-controlled fermentation space might be the best option, as consistent winemaking requires consistent conditions. That is because temperature swings — even modest ones between day and night — stress yeast in ways that compound over a two-week fermentation. A $30 heating belt and a $10 stick-on thermometer solve this almost entirely for most home setups.
While you won’t need a full laboratory setup, you will need a handful of basics on hand before you start: yeast nutrient, a hydrometer, pH strips, and EC-1118 as a backup strain. For fruit wines especially — apples, berries, honey — add one-quarter to one-half teaspoon of nutrient per gallon right at the start. Grapes have natural nutrient levels built in. Everything else runs lean. That’s what makes fruit wines endearing to us home winemakers, honestly — they’re a little more demanding, a little more unpredictable, and a little more satisfying when they actually work.
Stuck fermentation is fixable. Most of the time. Fix the right thing first and you’ll be fine.


Stay in the loop
Get the latest winemaker's friend updates delivered to your inbox.