First Batch of Homemade Wine — Beginner Mistakes That Ruin It
Homemade winemaking has gotten complicated with all the conflicting advice flying around. As someone who destroyed their first five-gallon batch of Concord wine so thoroughly it became a cleaning product, I learned everything there is to know about beginner mistakes the hard way. Today, I will share it all with you.
This article includes affiliate links. We may earn a commission at no extra cost to you.
The usual beginner guides are relentlessly cheerful. “Wine wants to happen,” they say. And sure, technically true. But they gloss over the specific, silent disasters that can kill a batch before you even realize something went wrong. Nobody warns you. You find out at week three when your carboy smells like a salad dressing.
This is the version they don’t write. The honest one.
Not Sanitizing Everything — the Batch Killer
Probably should have opened with this section, honestly. It’s the reason most first batches turn into vinegar instead of wine — not bad fruit, not bad yeast, just bad sanitation habits.
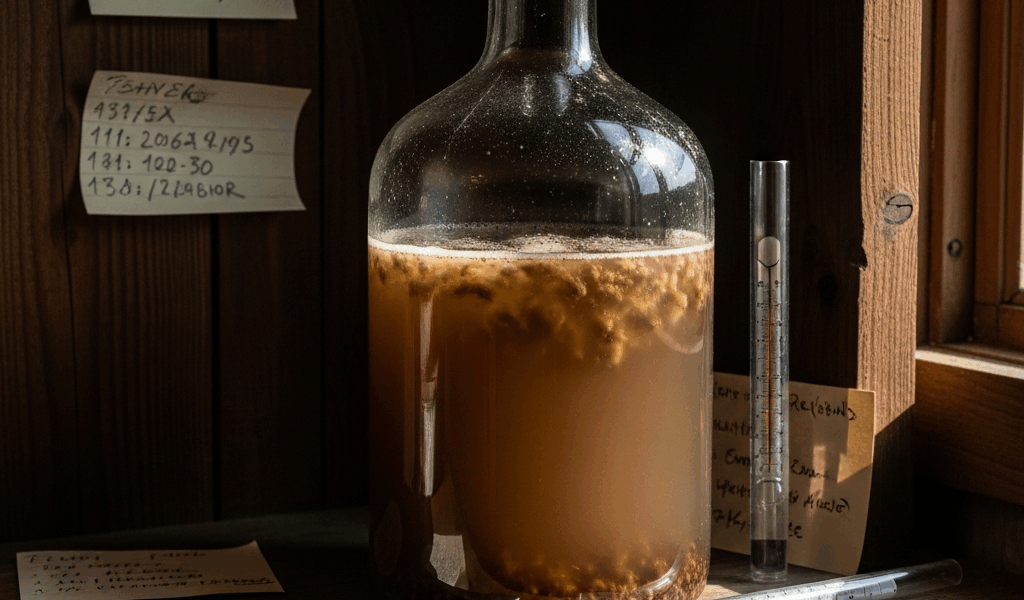
My first attempt involved a lot of confident rinsing. Hot water through the carboy. Hot water through the siphon tube. A quick rinse of the hydrometer
. I genuinely believed rinsing counted. It doesn’t. Water removes visible debris. It does absolutely nothing to bacteria or wild yeast spores clinging to surfaces.What you actually need kills things. Three options most home winemakers use:
- Star San — a no-rinse acid-based sanitizer. One teaspoon per gallon of water. You don’t rinse it off afterward — the residue is food-safe and harmless. Around $12 for a bottle that makes 50+ gallons of solution.
- Potassium metabisulfite — a powder, one teaspoon per gallon. Also no-rinse. Smells like burnt matches — genuinely awful — but it’s been the standard method for decades.
- One Step — oxygen-based cleaner and sanitizer. Similar job to Star San, different chemistry. About $8 per bottle.
I’m apparently a Star San person and it works for me while potassium metabisulfite never quite felt right. The smell alone put me off. So: carboy, airlock, rubber bung, siphon, hydrometer, turkey baster, stainless funnel, measuring spoons, pH strips, thermometer. Everything. Every single time.
Your wine sits in that carboy for months. Wild bacteria don’t need much of an invitation — a thin residue from last week’s cleaning, a speck of basement dust. Once established, they outcompete your wine yeast and produce acetic acid instead of alcohol. That’s vinegar. That’s what happened to me.
By week three, the smell was distinct. I added more yeast. I sealed everything tighter. Didn’t matter. The colony was already running the show. By month two, I poured the whole batch down the drain.
Don’t make my mistake. Get a spray bottle, fill it with Star San solution, keep it at your fermentation station. Spray everything that touches the wine. Wait 30 to 60 seconds. That’s the whole job.
Wrong Fermentation Temperature
Most wine yeasts — the packets actually labeled “wine yeast,” not the bread yeast some recipes casually suggest — work best between 65 and 75 degrees Fahrenheit. Some strains run cooler. A few tolerate warmer. None of them handle wild swings without complaining in the form of off-flavors.
My first batch fermented in a garage in July. Daytime temperatures hit 84 degrees. Nights dropped to 62. The carboy sat in direct afternoon sunlight. I didn’t measure the temperature inside the carboy — I just figured it would roughly match the air. It didn’t. Active fermentation generates its own heat. The wine itself was running warmer than the ambient air.
No vinegar that time. Worse, actually: solvent-like notes and a burnt-sugar aftertaste that months of aging never resolved. Some off-flavors don’t age out. They just sit there, judging you.
Where I ferment now:
- Winter basement — stays around 66 to 68 degrees, rock-stable. Not a dedicated wine cave, just a New England basement that doesn’t swing more than a couple of degrees per week.
- The guest bedroom closet during spring and fall. Closets buffer temperature better than open rooms. It’s not glamorous, but it works.
- A cooler with rotating ice packs during summer batches. Inelegant. Effective.
I also stick a $2 adhesive thermometer strip directly onto the carboy — the kind you press on and forget. It reads the actual temperature of the wine, not the surrounding air. Stable readings mean a good location. More than a 5 to 10 degree swing over a week means move it somewhere better.
You don’t need expensive equipment here. You need to find the one corner of your house that holds 65 to 75 degrees without drama. Basements, closets, interior rooms. Not the garage. Not the attic. Not the kitchen where your oven runs three times a day.
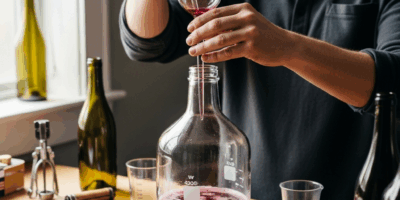
Bottling Too Early
The airlock stops bubbling. The yeast settles. The wine looks sort of clear. Bottle it, right?
Wrong.
Primary fermentation — the vigorous, visible, exciting stage — lasts one to three weeks. At the end of it, your wine is still a mess. Suspended solids, dead yeast cells, tannins floating around, volatile compounds that haven’t resolved. Bottle it now and you get something sharp, harsh, and potentially dangerous: residual sugar plus dormant yeast in a sealed bottle is a recipe for exploding glass.
Secondary fermentation and aging take weeks to months beyond that. Malolactic fermentation alone, when it occurs, can run six to twelve weeks. The wine needs that time — flavors melding, sediment dropping, harsh edges softening into something drinkable.
I bottled my second attempt at four weeks because it looked clear to my naked eye. That wine tasted flat and sour for two solid months in the bottle. By month four, drinkable. By month six, genuinely good. If I’d waited until month two to bottle, I would have skipped the disappointing phase entirely and gone straight to the good part.
Actual signs wine is ready to bottle:
- Hydrometer readings taken three days apart are identical — not “approximately the same.” Exactly the same number, twice.
- Hold the carboy up to a light source. You should see through it without significant cloudiness.
- At least four weeks since you pitched the yeast. Six to eight is better for most styles.
- Sediment has settled into a defined layer at the bottom — not drifting, not suspended, settled.
Use the hydrometer as your primary indicator. Your eyes will lie to you. Wine can look perfectly clear and still be quietly fermenting. The hydrometer doesn’t have opinions. It just gives you numbers.
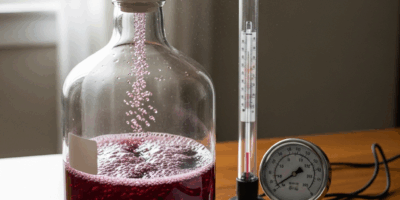
The Airlock Without Water Mistake
But what is an airlock, really? In essence, it’s a one-way valve that lets CO2 escape while keeping air out. But it’s much more than that — it’s the only barrier standing between your wine and oxidation during the months it sits in your carboy. An empty airlock is the same as no airlock. Air flows directly in. Wine oxidizes. It turns brown and tastes flat and vinegary.
I found my airlock bone dry at day fourteen. No idea when it happened. I thought I was checking daily. I wasn’t — or I missed a day somewhere. Water had completely evaporated from the S-shaped airlock, leaving nothing behind but an open channel to the outside air.
The wine never fully recovered. A thin film of pellicle yeast formed on the surface — technically harmless, practically a sign that oxidation had already done its work. The final product was brown-tinged, lacking any brightness or vibrancy. Oxidized. Flat. Disappointing.
Here’s the thing most guides don’t mention: airlocks dry out faster than you’d expect, especially in winter with forced heating running constantly. A standard airlock filled with plain water can evaporate completely in two to four weeks. In a dry heated house in January, faster than that.
The fix is easy — just stop using plain water:
- Glycerin (food-grade, about $8 per bottle). Mix it 50/50 with water and fill the airlock. Glycerin doesn’t evaporate at room temperature. One fill lasts for months without touching it.
- Vodka (80-proof or higher). Fill the airlock with cheap 80-proof vodka — the $12 plastic-bottle kind. Alcohol evaporates slower than water and inhibits any bacterial growth that might sneak through.
I’m apparently a vodka-in-the-airlock person and it works for me every time. Costs maybe a dollar or two per batch. I still check weekly — never fully trust an airlock — but with vodka in there, a missed week doesn’t end in disaster.
Adding Too Much of Everything
There’s a very specific beginner logic that goes: more yeast means faster fermentation, more sugar means more alcohol and richer flavor, more pectic enzyme means better clarity, more nutrients means healthier yeast. None of it works the way it sounds.
I added three times the recommended yeast to my first batch. Worried fermentation wouldn’t start. It started. The fermentation was so violent that liquid blew through the airlock and coated an entire basement shelf — a shelf with things on it, things I liked. The yeast burned through available sugars in about ten days, generating heat and stress that showed up as yeasty, sulfury off-flavors that took months to even partially resolve.
I also added extra sugar because the recipe said “to taste” and I interpreted that generously. Ended up with 16 percent alcohol in a wine meant to be 11 percent. Burning sensation on the palate. Balance completely gone. That was a $40 ingredient loss and three months of waiting to confirm the wine was unbalanced.
Follow recipe quantities exactly on your first batch — at least if you want something drinkable at the end. Not approximately. Not “adjusted for your preferences.” Exactly. Someone with forty more batches of experience than you developed those numbers for a reason.
Extra yeast wastes yeast. Extra sugar creates something closer to rocket fuel than wine. Extra pectic enzyme at higher doses can create haze rather than eliminate it. Extra nutrients that the yeast can’t fully metabolize break down into compounds that create off-flavors. The only addition that improves with more is sanitizer. You genuinely cannot over-sanitize. Everything else has a ceiling.
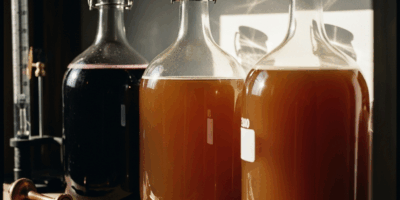
What I Do Differently Now
I keep a fermentation log — a $3 spiral notebook. Date, recipe, yeast strain used, starting gravity reading, fermentation location and temperature, bottling date, final gravity, tasting notes. That notebook has saved batches by letting me look back and identify exactly what changed when something goes sideways.
Basic equipment runs under $50 total. A hydrometer, a thermometer strip, a spray bottle for sanitizer, a bottle of Star San, vodka for the airlocks. That’s it. The difference between guessing and actually knowing what’s happening in your carboy.
I also wait now — genuinely wait. I’m not patient by nature. But fermented beverages have a way of forcing patience on you whether you want it or not. The wine is ready when it’s ready. Not when I’m curious. Not when I have guests coming. When it’s ready.
That’s what makes winemaking endearing to us hobbyists, honestly — it operates on its own schedule entirely. Your first batch doesn’t have to be a loss. Sanitize everything, control the temperature, keep your airlock full, resist the urge to bottle early, follow the recipe quantities. Do those five things and your first batch has a real shot at being something worth drinking.

Stay in the loop
Get the latest winemaker's friend updates delivered to your inbox.